Incubator Progress


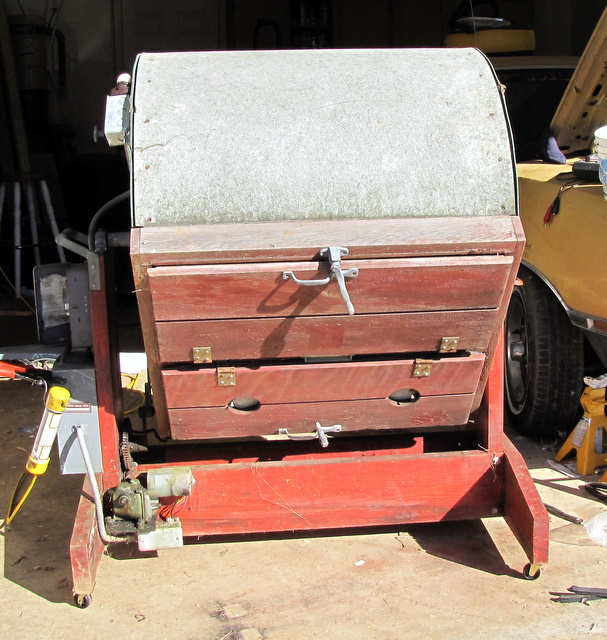
Since we were stuck at home because of the snow, and I couldn't do any yard work, I decided to do a little work on the incubator. I have been wanting to test it out, but I can't do that until I get new weatherstripping put on it, and I don't want to do that until I get the front refinished. Last week I bought the sandpaper I'd need, and some stain, and today I sanded off the old finish, and put a new one on. Once that dried I applied a layer of sealer to it. I hope that comes out looking nice. I couldn't get the hinges off without stripping screws, so I left them on and I'll clean those up with the dremel. So far it looks much better.

When it's dry I can put the weatherstripping on and take it for a test run, see if it holds it's temp and humidity properly. If that all works, I see no reason not to put a few eggs in it and see how it goes.

_

Putting it all together

I returned the egg trays to the incubator (they have been out of it since we brought it home) and suddenly the remaining spare parts all made sense.


The long skinny pieces were dividers for the egg trays


The weird piece with the holes drilled in it is the lock to keep the egg trays in place as the drum tips forward. It also has the remains of a sticker that says 'DO NOT DESTROY' so I figured it must be something important!


So now I can see it all assembled, and it really looks like everything is all there.


Even the holes on the bottom door, which I thought were fixed shut...

Are actually cleverly hinged little sliders for ventilation.

I have determined that the timer is not working, though I have located a replacement for about $100 - as soon as I have that kind of money to spend on this little project. I can still push the on/off button to make the drum rotate. So here's a demonstration:

It's alive! (The Incubator, that is!)

Yesterday I finally finished putting new casters on the bottom of the incubator (the old ones were rusty and broken). I dug around in my spare parts drawer and found a set of heavy casters that were perfect for it. Now that it was mobile I could roll it around. Dave's only request was that I not plug it in for the first time in the garage, it needed to be out in the driveway so if it burst into flames it wouldn't burn down the garage.

It was a beautiful day today, so I went ahead and wired the new cord into the fusebox (the old one looked like it had been mowed over and cut off). I rolled it out in to the driveway and hesitantly plugged it in. The fan came to life inside the drum. The light came on as the heater warmed up. Finally I threw the switch for the drum motor, and the whole thing slowly hummed as it tilted forward! It works!

Take a bow - giant drum!


I'm overjoyed to see the fan, heater, and motor working. Now I just need to replace the weatherstripping and see if the thermostat is working to hold a temperature, and if the timer works to rotate the drum back and forth. If it can hold a steady temp and humidity, and handle turning the drum, then I'll get some fertile eggs and give it a try.

Update: the timer seems to be DOA - but it's made by a company that is still in business and sells the exact same unit, so I might be able to get a new one to just swap in, or get the old one fixed. I have a call in.

_

Exploring the Incubator

I spent a bit of time poking around the incubator today

Here is the business end. You can see the long arm that goes from off center of the drum down to the electric motor.

The motor turns a big gear which tilts the drum back and forth, 45 degrees I think.


This is the main fusebox. Power comes in and is split off, one side goes to a thermostat controlling a regular electrical outlet inside the drum, the other side goes to the motor? I'm still not sure about how the timer and the mercury switch work together.

Update: Wires go from the junction block, through the left fuse and up to the timer, and from the timer to the junction box at the top of the drum. The right fuse is between the junction block and the main on/off switch. 


Two old-style fuses. They say '250v' on their bases.


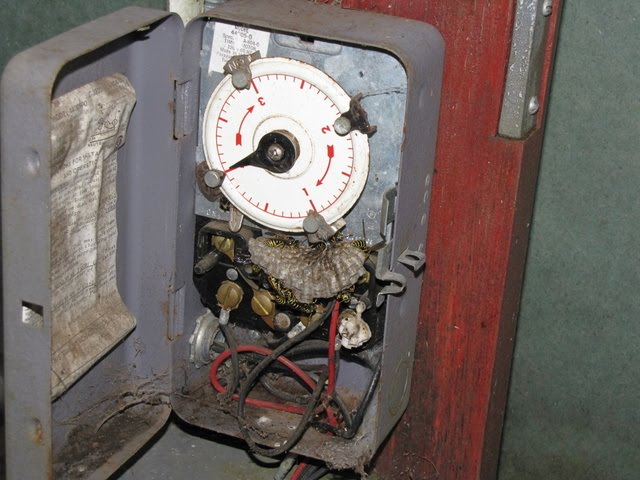
This box seems to be a timer of some sort.


The round knob with the black line pointing straight up goes to the 'wafer' which seems to be a thermostat. The guage is attached to either a thermometer or a hygrometer for measuring humidity inside the incubator.


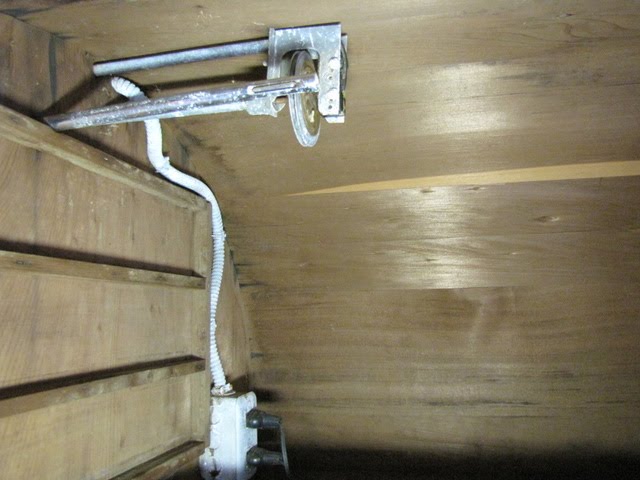
Inside the drum you can see the 'wafer', and hygrometer at the top, and the electrical conduit leading to the outlet below. Notice the condition of the inside of the drum, which is made of redwood, is very good.

There are two items plugged into the outlet - a fan and a heater.

Writing on the heater indicates it's a 120v, 150w Chromalox Strip Heater.

This tube sticking into the drum from the front is a thermometer or hygrometer, I'm not sure what the plate with the round hole below it is for.

It's attached to this gauge on the front between the doors


The lower door has vents but they are sealed shut.


 Looking at the inside of the door, you can see how thick these doors are. The point is to keep the drum insulated so the conditions inside can be maintained precisely. I still need to poke around a bit more to figure out what everything is and what it does.

It's a lot of work to do what a hen does naturally!

_

The Incubator

I have been looking for an incubator. Most of the expense in the chicks I raised to sell this year was from buying the chicks, so if I could hatch the eggs from my own flock, I'd save a lot of money - though I'd have a lot more roosters to sell too. Today my friend Martha emailed me to say she saw a free incubator on CL.

Free Humidaire Incubator, drum type, good for parts, or you can use it as is. I am out of the chicken business and just want it gone.

I called him up, he said come and get it, it was even close to home. I had no idea what I was getting.


It barely fit in the van!

One one side is a motor and control boxes, and it looks like it slowly rotates the drum back and forth to move the eggs.


A couple fuses and a mercury switch


No idea what this is, but I recognize an angry nest of yellowjackets when I see them!


Inside is a fan, and above that the racks for the egg trays, which came with it, I just took them out to move it.

What a bizarre contraption! The power cord was cut, and it's been sitting in the weather a while, but it looks pretty good. I can't wait to play around with it and see if I can get it working again.
Powered by Blogger.

Advertisement