Following directions - green tomato salsa

Last year my favorite thing of all the food I canned was the green tomato salsa. It was seriously YUM - and I just finished my last jar of it, so it was the perfect time to make more. There's no shortage of green tomatoes right now either.

Lots of green tomatoes! Don't worry, there's still plenty left to ripen (if they ever do).

I spent a couple hours chopping all the onion, peppers, garlic, and tomatoes, in fact I spread the job over two days! Finally, I had it all in the pan, with the liquid - a mix of lemon and lime juice, and spices.


I boiled it, meanwhile I boiled the jars, and soon it was all ready to put together. I was following a canning recipe exactly. I had a little assembly line set up. I thought I had it all but I forgot one really important step! After you fill the jars you're supposed to use something to gently get rid of the bubbles down inside the jar before processing. I realized just as I put the last filled jar into the water bath that I hadn't done this! I pulled the jar back out and looked at it, and sure enough there were big air bubbles throughout the jar. I was really disappointed in myself - I'm supposed to be a master food preserver, and getting out the bubbles is basic stuff! I went ahead and processed them.

The trick is that if you realize you screwed up within 24 hours, you can reprocess the food safely. I had Dave pick up some more jar lids, and once it was cool enough to handle, I opened all the jars. I noticed the salsa was pretty chunky, and I remembered my teacher saying it should be kind of thin, so I dumped the jars, two at a time, into the blender and gave them a quick spin before dumping them into a pot.


While that heated to a simmer I washed the jars and got them heated up in the water bath again. Then I refilled them with the blended salsa. This time the salsa was so thin there weren't any air bubbles to worry about. I lidded them up and processed them like before.
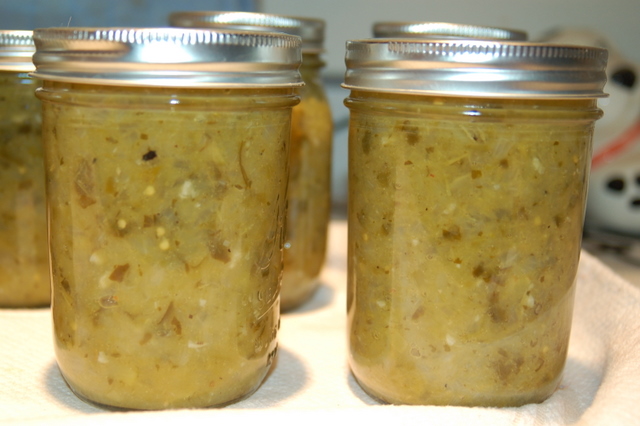

There are very few small bubbles visible in the jars after processing, but that's ok. It was worth the time to reprocess these. All I lost was a few lids, and that's better than having to throw out spoiled salsa a few months from now. I think I will be enjoying these until it's time to make more next year!

_

Canning Stock

We went grocery shopping late Labor Day evening, and ran across a pleasant surprise - the store had roasted too many chickens and was clearing them out for $3.50 each! What a score! You can't usually buy a whole chicken for that price, let alone roast it yourself! We bought two, brought them home, and picked all the meat off them, and threw the bones in the pressure cooker. I also got a deal on a package of 6 half breasts, so I de-boned those and threw the trimmings into the stockpot and froze the meat for later. Then I threw in all the onion and carrot trimmings I'd saved up in the freezer, along with some garlic and celery, and I let the pressure cooker do it's thing, and by evening I had a giant hot pot of stock.

The brilliant part is that my last batch of stock was packed in the freezer, so I took it out and dropped those stock ice-blocks into the pot of strained stock, and as they melted they cooled off the new batch, and within minutes the whole thing was ready for the fridge. I thought that worked particularly nicely! After a day in the fridge I skimmed off all the fat, and it was ready to can.

So today I spent my morning pressure canning 17 pints of stock. It took all day, because it required two batches. I should have done quarts, then it would have only taken one batch, but I usually use it a pint at a time. The pressure canner wasn't as nerve-wracking as last time. I've used it to pressure cook stock a couple times, and this is my second time canning. I think it gets easier the more times you practice.


Beautiful!

_

First canning session of the year

I pulled out the turkey fryer (electric water-bath canner) and got ready for a marathon canning session today. I found a bucket of pickles out in the garden!


Some were really big, and some were just in the 3-4 inch size. I decided to slice up the little ones into spears for dills, and slice up the big ones into chips for sweet pickles.

8 pints of quick pack kosher dills...


And 8 pints of sweet pickle chips - yum! I was down to just one jar left from last year, so the timing was perfect!


Then we went to visit a friend who has a blueberry farm! We all chatted and picked a bush clean, and came back with a bucket-full of delicious blueberries. 12 quarts! I cleaned some and put them in the freezer, and more went in the fridge, and then I mashed some up for jam.


This may have been the most work I did all day!


 Ah, the fruits of my labor - filling the pantry until next season!

_


Turkey noodle soup - oh, yeah!


Turkey Noodle Soup - part 2 - The stock simmered in the crock pot all night, and this morning I strained it, and added one onion, two carrots, two celery sticks, all diced, along with some thyme, salt & pepper, and garlic. Let that stew until lunchtime. Then I added noodles and white meat leftover from last night. Once those were cooked I thickened it with a little cornstarch, and served it for lunch with some no-knead dinner rolls. So good! I'll be doing this every time I have a carcass leftover! That could NOT have been any EASIER! And what a way to squeeze every last little bit our of a turkey!

_
_

Making the most out of a turkey

Dave wanted turkey for dinner, and the only turkey breast they had at the store was a whole turkey breast - $15! Well, it's ok, because I brought it home and de-boned it, and that left half to go in the freezer for another day. Then I took the carcass and put it on a roasting pan with carrots, celery, onion, and an extra leek that was past it's prime, and popped them all in the oven to roast. I also roasted the breast half we were having for dinner. My favorite recipes are simple, and turkey breast is awesome when roasted simply with olive oil and salt & pepper. I put the breast half in my iron skillet, and roasted it for 45 minutes as well.

When the carcass was done cooking, it and the vegetables were nicely browned. I took them out and put them in the crockpot with enough water to cover, along with sage, and thyme. I'll let that cook all night, and by morning I'll be ready to make turkey soup for dinner tomorrow, and the extra I'll freeze for quick lunches.

As for the dinner breast, it came out crispy on the outside, juicy on the inside. And my favorite trick is roasting in the skillet, because then I can rest the meat on a plate, and make gravy in the skillet with all the lovely brown bits left behind. So delicious! And we not only had dinner, but more than half the breast was still left for lunches or another dinner later this week. I'd say that turkey was $15 well spent!

_

Homemade canned chicken stock

Ok, I say chicken stock, but I'm not sure if it's technically stock or broth. It's thick, made from bones, and it will gel up in the fridge, so I call it stock.

I started out with my usual steps for chicken stock. I thawed out my bag of chicken parts. I save all the necks, backs, gizzards, hearts, anything I don't use when I cut up a chicken, and pop them in a big zip lock in the freezer until the bag is stuffed full. One bag holds about 4 lbs of parts! I lay it all on a roasting pan with some onion (skins on), carrots, and celery - give it all a misting of olive oil, and pop in a 450 oven for an hour or so.

Once that's done the house smells so incredible we're all wondering why we didn't just roast some chicken, but no, we're working on stock! Instead of putting it in the big pot with water and simmering it for 20 hours or so (like usual) - I put it in my new pressure cooker.


I learned to use the pressure cooker/canner at the food preservation classes I took last summer, but I didn't have a chance to actually buy one until a couple weeks ago when a friend got a really great deal on some and sold me this one, brand new, for about half what they go for in the store.


Lots of people are scared of pressure cookers, but they are not as scary as they seem, as long as you understand them and remember to always treat them with respect. Modern canners have some important safety features to protect you. As the water in the pot heats up, steam is vented through a vent pipe. Once it is ready to cook, you put a weight on top of the vent pipe which is just heavy enough to allow the canner to pressurize to the amount you want, and it wobbles back and forth letting out excess pressure. As the pot pressurizes the Lid Lock pops up and prevents you from removing the lid until it is de-pressurized. In the back of the lid is a tiny black rubber plug which is a safety valve. If the pressure gets too high it will blow that plug out and release the pressure - so no worries about the lid exploding off. The dial gauge is nice to have just so you can monitor the pressure. Gauges should be checked every year for accuracy.

** That weight on the vent pipe is probably the most likely thing to cause a problem. You put it on to pressurize the pot, but you can't remove it until the pot has cooled off and depressurized on it's own. If you remove it, scalding hot liquid could come out through the vent as it rapidly depressurizes, and that would be BAD - so once the weight is on, don't touch it again until the gauge reads zero!**


After only 20 minutes in the pot, 4lbs od chicken was reduced to a soft mash (which I gave to my chickens and they really enjoyed)!


And I had a couple quarts of the most flavorful stock I've ever made! Seriously, this tasted more like chicken soup than any I've made so far.

So once I had enough stock to can, I had to set up my canning gear. This includes:


My turkey fryer/water bath canner - just to sterilize and heat up the jars so they won't crack when filled with hot broth. Also a small pan with hot water for the lids. And all the canning tools. And towels. Gosh, what a production. And of course the pressure canner, cleaned up and ready to go again.


As I filled each hot jar with hot stock, I put it in the pressure canner to wait for a full load.


Finally they were all in, and I had to vent the air out of the canner. This is where you wait for a steady tower of steam shooting out of the vent pipe (hard to see in the picture above). You wait until it is steady steam, and let it do that for 10 whole minutes!


Then put the weight on and let it pressurize. Notice the canning weight is different from the cooking weight. You cook at 15 lbs pressure, but you can at 11 lbs. Again the weight sits there and wobbles, letting out pressure and keeping the canner at 11 lbs. Because I wanted to roast my chicken and make the stock with vegetables, I consulted with the other master food preservers and decided it would be safest to can the stock using the recipe for vegetable soup - 75 minutes processing time, instead of 20 for plain chicken broth.

I hung around the kitchen the whole time, watching the pressure gauge, making sure the weight was still wobbling away. If it goes below pressure you have to start the time over! Finally it was over, and I moved the pot off the heat to cool. There's a process that must be followed for canning, and I followed it precisely! Improperly canned stock could contain botulism, and I didn't want to chance that!

Beautiful! 8 Pints of shelf stable stock, going in the cupboard instead of filling up my little freezer!


And with the leftovers I made some Northwoods Bean Soup - and even Dave thought it was great! You can't make good soup without great stock. Making it myself is probably the one thing I have learned that really makes a big difference in my cooking.

Churning Butter

Yes, I said Butter. I bought a half gallon of whipping cream from the local dairy - real, local milk from right here in Clark County. I let it come to room temp, added a pinch of salt, and let the Kitchen Aid go to it. It only took about three minutes to go from whipping cream, to whipped cream, to break over in to butter.

Even with the spatter shield on, this is a messy job!


But look - Butter!

After it was separated, I had to rinse the butter repeatedly under cold water while kneading it to get out all the buttermilk. This quickly turned into a giant mess where I was getting butter everywhere! I'll think before I stick my hands into it next time! But it worked and I formed three logs to freeze, and refrigerated a pint of it. Had it on waffles this morning and it was great - not as salty as regular salted butter, and had more of a sweet cream taste.

Waffles!

I went to Goodwill the other day and I scored this pasta machine (without it's handle) for only $5! Woo-hoo! I've been wanting one for a long time but they are very expensive. I just need to find a handle to crank it with and I'm set.

I also found a waffle iron for $10. I've been looking for one for a while, because Dave loves frozen waffles for breakfast, and I thought I could make better waffles at home.


Although it is a low end Proctor Silex Waffle Iron, it really works great! It has no settings, just a light on the lid that lights up when it's ready to cook, and goes off when the waffle is done. I was highly skeptical it would work, and in fact on Good Eats when he talked about which waffle iron to buy he specifically held one of these up (with the name removed, of course) and said not to buy it. It works great! It actually makes them just a bit underdone, I might like them better just a bit more crispy, but they are perfect to freeze, because they get crisped up in the toaster when you reheat them.

I made regular buttermilk waffles, and then I made chocolate chip waffles (both Good Eats recipes). The chocolate ones are particularly nice after a long day - pop a couple in the toaster and it's like getting a warm, fresh, chocolate cookie :)

Yum!

_

Irish Stew and No-knead Dinner Rolls


I hit two home runs for dinner tonight! Irish Stew and No-Knead Dinner Rolls :) The Irish Stew was a very simple crockpot recipe in my old Betty Crocker cookbook. I bought two pounds of local lamb stew meat last week, and I browned it (I used a little bacon fat to get it going, but after that it rendered quite a bit of fat out of the lamb). I browned it in the skillet, because my only dutch oven is a campfire oven, so it has legs, which makes it difficult to use on the stovetop. As I finished browing each batch I moved them to the dutch oven. While the next batch browned I chopped onions, carrots and potatoes and layered those on top of the meat. Repeat for three batches. Sprinkle some of my freshly dried thyme on top, deglaze the browning skillet with canned beef broth and pour all those lovely browned bits into the dutch oven, lid on, and parked it in a 300 degree oven for two hours. Then we turned it down to warm and left it for another three hours. At the very end I made a quick roux on the stovetop and stirred it in to thicken it up. Dave said it was a winner. The meat was just falling apart, and the veg was still in big chunks, but quite soft. Delicious!


The No-Knead Dinner Rolls was a recipe a friend recommended. It took about an hour and a half of rising time, but it was worth it. Delicious, fluffy rolls, a perfect companion to sop up the Irish Stew from the bottom of the bowl.

_

Gardening, and pickled 3 bean salad

The garden has been pretty unusual this year. I am getting green beans out of it now, enough that Dave is already tired of them. I've frozen some. I was flipping through a recipe book and saw a recipe for canning pickled 3-bean salad, and that sounded like a good way to use up some beans.


Dave thought it tasted 'interesting', which is pretty good for him, since he hates beans.

I'm getting tomatoes off the '4H' tomato plant, they are kind of like big cherry tomatoes. Very nice. Martha said they were always the earliest tomatoes, and they are this year too, it's just that 'early' has come really late! Next year I will limit my tomatoes a bit more. I planted 8 plants this year, filling two rows, and that was overdoing it. We trimmed the plants back to try and encourage them to finish the tomatoes they've already set.

Likewise a whole row of green and yellow beans was overkill. I have to remember we only need enough for two people! Of course one zucchini is overkill, but you can't really plant less than one!

My 12 foot row of potatoes produced about a colander full of potatoes. I should have just bought some at the auction last week. They weren't even worth the trouble! Potatoes are going on my list of things it's better to let someone who knows what they're doing grow.


Today I planted a 4x4 area with lettuce and winter greens (chard, broccoli rabe, stuff like that). I'm going to clear one more area for my cold frame and plant that in October. There are still chard and spinach out there, and carrots are coming along now that the cucumber plants are gone. So the garden is slowly moving into it's winter phase. And that's ok because today was a gloomy, rainy day, reminding us that winter is not too far away.

Garden update - pickling things

This year's garden is all about learning. I've been enjoying a few fruits of my labors, despite the weird weather this summer.

We've had lots of Yellow beans, too many spaghetti squash, and a few new red potatoes.

More yellow beans, eatin' cucumbers, and a few precious tomatoes

And a bushel of pickling cucumbers!

The pickling cukes have been coming along all month, but even when small they were starting to turn white. I thought that meant they needed to stay on the vine, but they just got bigger and bigger. Today I went out and picked them all, and many were HUGE. None ever got that nice dark green color I wanted to see. So I went ahead and picked out the greenest, smallest of the bunch, and set them up to ferment. I really wanted to brine some pickles this year, I planted them with that in mind.

I have a food-safe bucket, and cleaned the pickles, removed the blossom ends, and weighted them down in the brine with a plate. Now I just need to clear the scum off the top every day or so until they stop bubbling, and I should have pickles. I'm a skeptic - maybe people have been doing this for 10,000 years, but I still need to see it for myself!

I think the rest of the oversize cukes will go on the compost heap. They are too big and seedy, and they'll just get soft if I try to pickle them. It's my own fault for not knowing when to pick them, or maybe it was just the weather this year.

Maybe I can still get some smaller cukes at the farmers market. I did that earlier this summer, picked up some from Hermiston, Oregon, and made quick kosher dills, and I just opened them this week and they taste delicious!

 And don't they look pretty?

_

Canning Peaches

Peaches are my very favorite fruit, and good peaches are available for such short time each year, I used to eat a lot of canned peaches from the store. Unfortunately they were a sad substitute for the fresh stuff. I liked a particular type from the store, but it was expensive, and one day I noticed on the label that the peaches were from Israel! Now, I have nothing against Israel, but I don't want my food to be that well traveled! So after finishing the Food Preservation classes this spring, I was really looking forward to canning my own local peaches.

Last week I went to Kunze Farms in Vancouver and bought a 20# box of peaches. They were very nice there, and gave me samples to try so I could get just what I wanted. The local peaches weren't great because of the weird weather we've had this year, but they had some peaches from Yakima (the dry side of the state), and they were juicy and delicious! So even though I wanted 'local' peaches, I decided local to my state was better than nothing.


 The ladies said to give them a few days to ripen, and that when they were soft around the stem end, they'd be perfect. So all week I've been checking them and eating peaches that were getting overripe :) YUM! Finally I decided they were all ready to can.


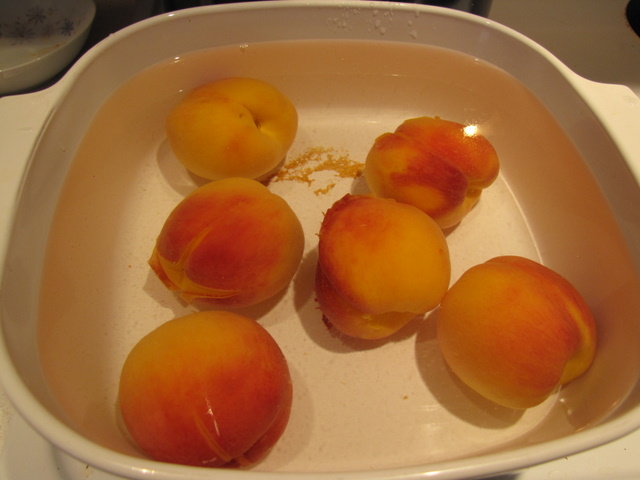
So, first step in canning peaches is to peel the fuzzy little guys. I got a tip on how to do this from the How To Cook Like Your Grandmother blog - which is an awesome blog if you love good food! You cut an x on the bottom of them and drop them in boiling water for a minute.


Then you put them in cold water.


And the skin peels right off. The hardest part of this whole process was cutting the peach in half and prying the halves apart without crushing them. I'm afraid quite a few got mangled in the process. Then I remove the pit and throw them all in a big pot, which contains white grape juice and some 'Fruit Fresh' to help them keep their color. Pits go in the compost heap, skins and scraps go in a bowl for the chickens.


When I had enough I brought the pot to a boil and then filled my first six jars, sealed them, and put them in the water bath canner. While they boiled for 20 minutes, I skinned and cut up the rest of the peaches.


Then I was able to do the next six jars. I'm using pints here because quarts just seem too big for just the two of us. So the second batch goes in the canner.


Oh my gosh, there's still a bunch left. Enough for two freezer containers full...


And a peach cobbler...YUM!


What a great day! :)


And enough local peaches to last me until next peach season!
_

Currant Jelly

I went to the farmers market Saturday and picked up a flat of local Currants. I was interested as soon as I saw them, because Grandma used to go on and on about how great Currant jelly was, and how hard it was to find. The lady selling them had brought some of her own jelly along to give samples from, and it tasted great. So I took the plunge and bought a whole flat of them.

Currants have tiny little seeds, and are very tart. I cleaned them and pulled off the bad ones, and put them all in a pot with a cup of water and set it to simmer.

Soon it all fell apart and the berries burst and let out their juice. I mashed it a bit with a potato masher.

Stems and all! Then I packed it into a jelly bag, and hung it over a bowl to drip out all the juice. Before going to bed I put what had drained out into a container in the fridge, and left it hanging overnight.

Half a flat of berries reduced to one jelly bag. I got about 2 cups of juice, and I need 4-5. So more tomorrow.

Update: I didn't get any pictures of the actual jelly making. I ended up with 5 1/2 cups of very thick juice, and the instructions said I needed 6 1/2 and I could add 1/2 c of water to get there -so I went ahead and added a whole cup. I followed the instructions on the pectin packet, but this stuff was so thick, I'm not sure it needed pectin at all. It was setting up before I got it out of the pan! I made 8 half-pints. Processed them in my electric turkey fryer/water bath canner. That canner makes the whole process so much easier. I'm spoiled now!

This is the first time I've made jelly, I've always made Jam before. This stuff is pretty :) Tastes good too - sweet/tart!


_
Powered by Blogger.

Advertisement